
Cab Roof Finished and Window Seals
Cab Progress
The new cab roof has been rolled from a single sheet of 2mm mild steel by a company in Elgin. The main part of the roof (3200mm radius) was formed by rolling and the edges (150mm radius) were formed by discrete bending. A template was provided to assist in the forming process. The roof was lifted into place and did not require any adjustment. It was then drilled and bolted to the curved angles which are fixed to the cab ends using ¼" Whitworth round headed bolts specially machined out of stainless steel.
 |
| The new roof is delivered |
 |
| The roof is fitted |
The roof has half-round feather edging riveted all round its edges. This requires four pieces to be formed (one for each corner). The roof corners are 4” radius and the edging is first bent to 90 degrees using the same bending jig as was used for the edging on the cab side openings, but with a different disk to get the correct radius. The strips then have to be curved in the other direction to conform to the roof profile.
The first step is to bend the 3200mm radius using a set of bending rollers.
The next step is to bend the 150mm radius at the edge, which is much harder. This is done by clamping the strip to the side of the roof to mark it, then heating that area and bending that small section only. The process is then repeated many times until the curve matches the roof. The edging is then drilled with 3/16 inch fixing holes and temporarily fixed to the roof using 2BA nuts and bolts.
The next step is to bend the 150mm radius at the edge, which is much harder. This is done by clamping the strip to the side of the roof to mark it, then heating that area and bending that small section only. The process is then repeated many times until the curve matches the roof. The edging is then drilled with 3/16 inch fixing holes and temporarily fixed to the roof using 2BA nuts and bolts.
 | |
| Forming the 3200mm radius |
 |
| Making the edging fit |
A peculiar feature of the original edging was that 1” wide strip was used around the cab roof and 1¼” strip was used around the cab opening. At the top of the cab opening the two different widths were welded together which can best be understood by looking at the pictures. The roof edging is separate from the edging around the cab sides so that the roof can be unbolted and removed separately.
 |
| The completed cab |
Curved rain bars are fitted each side so that most of the rain water drips off front and back and not over the cab opening. They are attached to the roof using 2BA stainless bolts tapped into the roof with a locking nut behind. This means further trimming of the edging. All in all a lot of time-consuming “fettling” is required to get everything fitted properly.
To prevent corrosion a sealing compound was used between the edging and the roof and rain bars and the roof. Shell Tixophalte was chosen for this as it is a high specification waterproof seal. The sealant was applied and the edging bolted back using 2BA nuts and bolts which were tightened to squeeze out surplus sealant. The bolts were then removed one at a time and replaced by rivets which were hammered over by hand. The roof is now ready for final painting with black bitumenous paint.
 |
| The completed roof. Note the different edging widths on the side of the roof. |
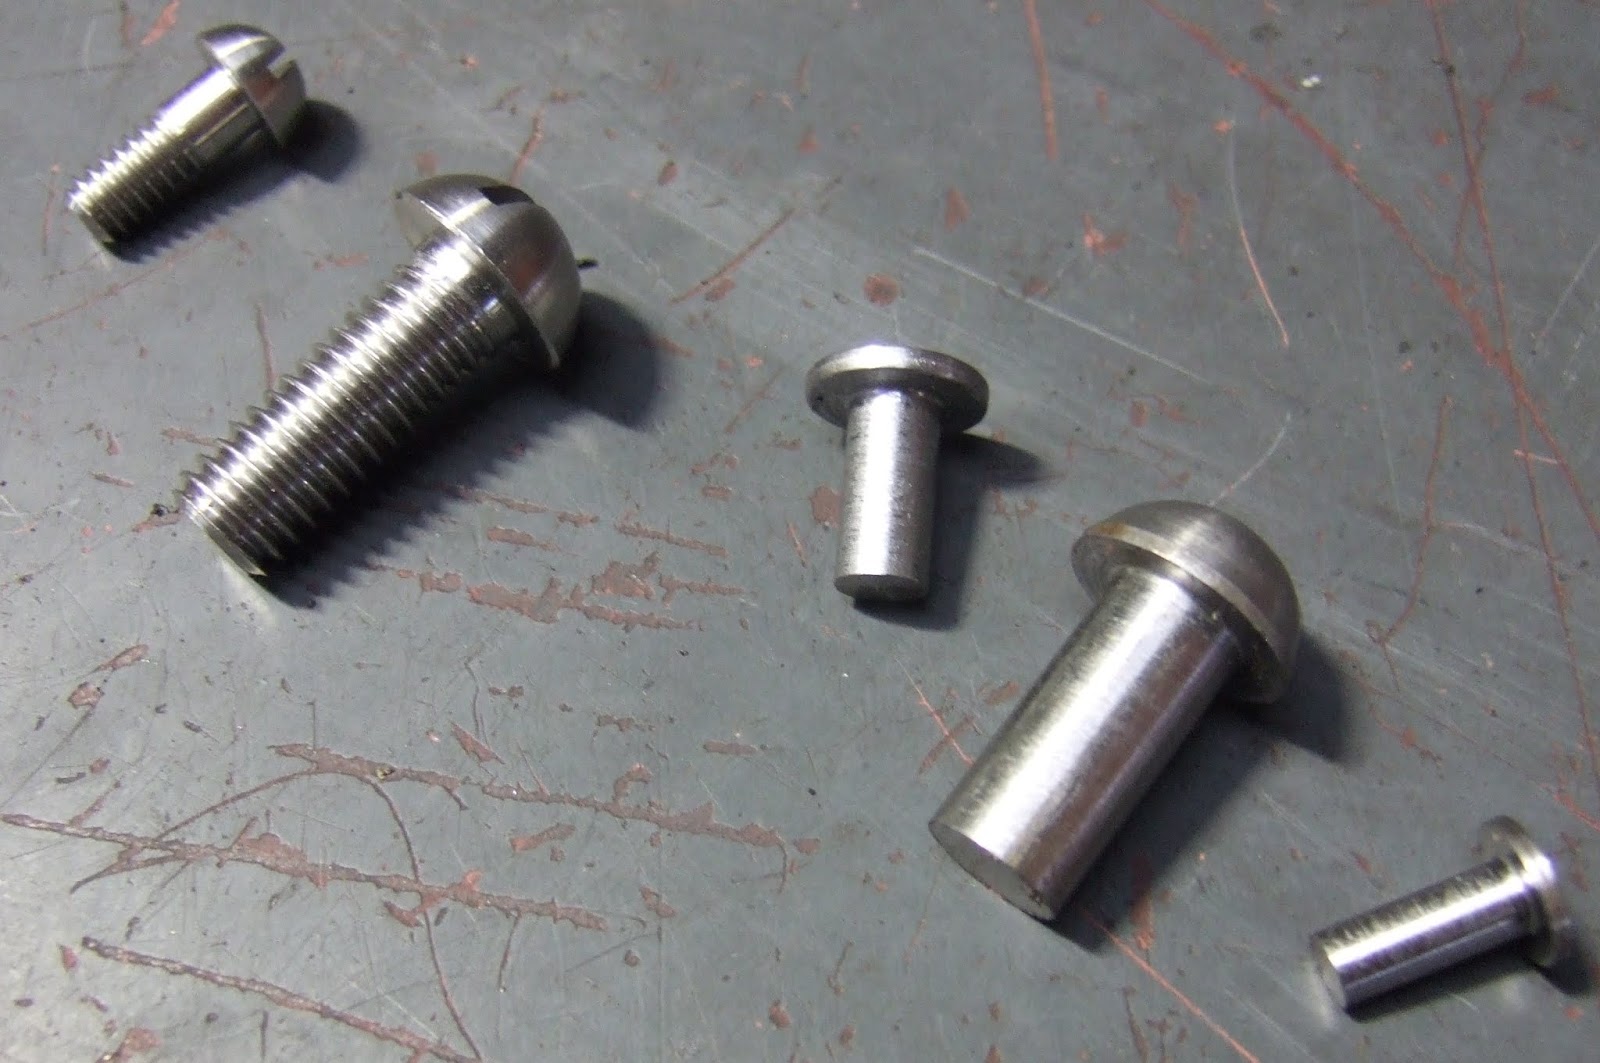 |
| The specially-made roof fasteners |
The battery box has been fixed in and the battery fitted inside. A heavy-duty battery isolation switch has been fitted on the side of the box. Only the starter motor is connected at the moment. The next step will be to connect the dynamo and check that is charges OK. The rest of the wiring will need to wait for new brass-bound armoured cable to replace the originals.
 |
| The battery box is fitted |
The original cab interior had a cream roof and dark green walls and battery box. It has been decided to paint the upper half of the cab interior cream as well to make the cab lighter.
 |
| Undercoat applied to cab interior |
Window Seals
The windows on the front and back of the cab have aluminium frames with special rubber seals to hold the glass in place. The original rubber seals were perished but we still have a sample piece. To fit a window, the rubber seal is placed around the glass and offered up to the frame. The seal has a “flap” at the front that must be pushed into a groove all round the frame in order to stop the glass coming out.
The picture shows the sample piece inside the frame. The insert on the right shows the cross-section of the rubber seal. The insert on the left shows the nearest profile that is theoretically available. Unfortunately, this profile is not a stock item, and the manufacturers require an order of at least 30 metres at £15 per metre. As we only need 7 metres this is not an option.
 |
| The window seal with profiles. |
The next approach is to consider 21st Century technology in the form of 3D Printing. It may be possible to print sections of seal in a suitable material. Shorter lengths could be glued together with Cyanoacrylate adhesive as most 3D printer beds are not long enough (we need 21”).
We have access to an early 3D Printer for the purposes of investigation. If the process looks promising, we may need to investigate getting the job done externally if this is not too expensive.
An initial sample length of the seal has been drawn up using 3D CAD software. 3D printers normally print rigid shapes using ABS plastic, so we will produce trial samples in this material to get the best profile and finish. If this looks good we will buy some TPU filament (Thermoplastic Polyurethane) and try printing a sample in that material (which is flexible). If that works, we will look at getting all the seals printed.
 |
| First trial samples in ABS |
However, it is still quite possible that 3D Printing will not be good enough with currently available technology. In that case we will use rectangular U-shaped seals (which are available from stock) and glue the seals to the frame. Of course this means that if in future you need to replace the glass you will probably have to destroy the old seals and replace them with new, but it is the only affordable way out.